
接口自动化基础之pytest
一、接口自动化基础之pytest框架用法、规则、配置、标记(day13)
创建新的项目:api_framwrok_241
1. 什么是测试框架
测试框架:抽象出来一个工具集合,提供大量组件或功能:
- 用例发现:自动化的从各目录、各文件种收集测试用例
- 用例管理:根据需求对用例进行筛选、忽略、跳过等操作
- 环境管理:在用例执行前后,自动完成某些操作,构造合适的执行条件
- 用例执行:执行用例的测试步骤
- 断言:执行用例时,判定执行结果是否符合预期
大部分的编程语言都有对应测试框架:
- Java: JUnit, TestNG
- php: phpunit
- Python: unittest, pytest
- 更多……
unittest:
- python内置、无需安装
- 用浓郁Java风格
- 无法升级、扩展
pytest:
- 手动安装、自由切换版本
- 有浓郁Python风格
- 有丰富第三方生态进行扩展
- 完全兼容unittest
2. pytest测试框架
1. 安装pytest
1 | pip install pytest # 安装pytest |
pip install安装第三方库的命令pytest第三方库的名字-U升级,保持最新版==7.0指定版本号
1 | pip show pytest # 查看pytest信息 |
2. 编写测试用例
- 创建:
test_开头的py文件 - 创建:
test_开头的函数 - 创建:
assert断言
示例文件 test_abc.py:
1 | def test_ok(): |
3. 执行测试用例
命令行
1
pytest
代码
1
2import pytest
pytest.main() # 启动测试框架
4. 看懂执行结果
执行环境
1
2platform win32 -- Python 3.12.0, pytest-8.1.1, pluggy-1.4.0
rootdir: E:\PyProject\api_framework_241用例收集情况
1
collected 2 items
用例执行过程
1
2test_abc.py .F
[100%]
| 缩写 | 单词 | 含义 |
|---|---|---|
| . | passed | 通过 |
| F | failed | 失败(用例执行时报错) |
| E | error | 出错(fixture执行报错) |
| s | skipped | 跳过 |
| X | xpassed | 预期外的通过(不符合预期) |
| x | xfailed | 预期内的失败(符合预期) |
用例失败原因
1
2
3
4
5
6
7
8================================== FAILURES
===================================
__________________________________ test_fail
__________________________________
def test_fail():
> assert 1 == 2 # 测试失败
E assert 1 == 2
test_abc.py:6: AssertionError测试框架总结信息
1
2
3
4
5=========================== short test summary info
===========================
FAILED test_abc.py::test_fail - assert 1 == 2
========================= 1 failed, 1 passed in 0.03s
=========================
5. 用例发现规则
pytest识别、加载测试用例过程称之为用例发现,规则:
遍历所有的目录(venv除外)
遍历所有
test_开头 或者_test结尾的python文件遍历所有
test开头的类类不能拥有
__init__方法核心原因:pytest 不使用
__init__来创建测试类实例当你运行 pytest 时,它会:
- 扫描所有以
Test开头的类(且不包含__init__的类会被特殊处理); - 对于每个测试方法,单独创建一个新的类实例;
- 这个实例是通过无参方式创建的(即
TestClass()),**不会调用你自定义的__init__(self, ...)**(如果你写了带参数的__init__,就会出错)。
收集
test_开头的函数或者方法,作为测试用例
重点:pytest,只有函数和方法,才被视为测试用例,目录、文件、类,作为用例的容器
3. pytest高级用法
1. 配置
pytest 有2种配置方式:
- 命令行参数
- ini配置文件
查看所有的配置项
1 | pytest -h |
可以分成三大部分
- 参数
- 配置项
- 环境变量
常用的命令行参数:
-v:增加详细程度-q:减少详细程度-s:不进行内容捕获,才能正常的输入输出- “内容捕获”(Output Capturing)是 pytest 的一个默认行为:pytest 会自动“捕获”(拦截)测试过程中所有的标准输出(stdout)和标准错误(stderr),比如
print()、日志输出等。
- “内容捕获”(Output Capturing)是 pytest 的一个默认行为:pytest 会自动“捕获”(拦截)测试过程中所有的标准输出(stdout)和标准错误(stderr),比如
-x:快速退出(遇到第一个失败就退出,冒烟测试)
常用的ini配置项:
- 在根目录中的创建
pytest.ini文件 - 创建 pytest 选择器
- 按行,添加配置项
示例 pytest.ini:
1 | [pytest] |
add options
配置是用来改变pytest
约定大于配置:对于成熟的工具来说,默认配置往往是比较好的配置,可以适用于大部分场景。如非必要,请勿更改。
2. 标记mark
mark主要用途是让用例和用例之间变得不同,实现用例的筛选。
1. 用户自定义标记
注册(在
pytest.ini中):1
2
3
4
5
6[pytest]
markers =
api
ui
ut
e2e标记用例:
1
2
3
4
5
6
7
8
9
10
11
12
13
14
15
16
17import pytest
def test_ok():
    assert 1 == 1  # 测试通过

def test_fail():
    assert 1 == 2  # 测试失败
def test_baili():
pass
def test_beifan():
pass筛选用例:
1
2
3pytest -m api # 只执行拥有api标记的用例
pytest -m "ut or api" # 只执行拥有ut或api标记的用例
pytest -m "ui and api" # 只执行同时拥有ui和api标记的用例
2. 框架内置标记
- 不需要注册,直接使用
- 不仅用于筛选,还有特殊效果
- 不同的标记,拥有不同的效果
示例:
1 | import pytest |
@pytest.mark.xfail 的意思是:“我知道这个功能现在有 bug,会失败,但我不希望它让整个测试套件变红(失败)。”
🧩 举个生活例子:修车师傅 vs 故障车
假设你是一个汽车质检员,每天要测试 10 辆车是否能启动。
- 其中一辆车(编号 #5)已知发动机坏了,老板说:“这车我们知道有问题,先别管它,等零件到了再修。”
- 你还是去“测试”它,结果:
- 情况 A:车果然打不着火 → 你说:“嗯,和预期一样,没问题。” ✅
- 情况 B:车居然打着了!→ 你吓一跳:“咦?不是说坏了吗?难道修好了?谁修的?!” ⚠️
3. 参数化测试
参数化测试:通过数据修改参数,从而改变测试用例。
数据驱动测试 = 参数化测试 + 数据文件
参数化之前:
1 | def add(a, b): |
参数化之后:
1 |
|
✅ 4. 支持单参数
1 |
|
✅ 5. 可以叠加多个 parametrize(笛卡尔积)
1 |
|
二、接口自动化基础之pytest框架fixture、常用插件、Allure报告、企业级定制(day14)
1. pytest夹具fixture
夹具: 在用例执行之前,执行之后,自动的运行自定义代码
场景:
- 执行之前:创建测试账号,执行之后:删除测试账号
- 执行之前:启动浏览器,执行之后:关闭浏览器
- 执行之前:创建测试场景,执行之后,销毁测试场景
1. 创建fixture
- 创建函数
- 添加装饰器
yield
1 |
|
简便的方式创建fixture
1 |
|
2. 使用fixtures
1 | def test_abc(f): # 使用fixture,得到它的返回值 fixture 函数的名字 = 测试函数参数的名字 = 你在测试里使用的变量名 |
执行结果
1 | test_abc.py::test_abc 启动浏览器 |
简便的方式使用fixture
1 | # 使用fixture |
✅ 什么时候传参?什么时候用 usefixtures?记住一个黄金原则
如果你需要拿到 fixture 返回的数据(或对象),就把它作为参数写进测试函数;
如果你不需要返回值,只希望它“自动执行一下”,就用@usefixtures。
3. fixture的作用范围
fixture启动比较慢,能否共享(复用)fixture?
- 每个用例执行fixture:5s * 3(fixture执行次数) = 15s
- 每个用例复用fixture:5s * 1(fixture执行次数) = 5s
pytest中,用一个作用范围内fixture会自动的共享(复用)
pytest中,支持5级作用域:
- function:默认,不共享
- class:同一个类中用例,自动共享
- module:同一个模块(文件)中用例,自动共享
- package:同一个包(目录)中用例,自动共享
- session:所有用例,自动共享
1 | import pytest |
4. conftest.py
从名字上看:测试配置
从内容上看:python代码
从效果上看:被pytest自动导入,实现跨文件的fixture
每个目录都可以创建一个conftest.py
子目录的conftest.py可以屏蔽父目录的conftest.py
哪个文件里用例更近,它的优先级就越高
1 | project/ |
5. fixture的其他写法
对于模块级夹具有 3 种写法:
- setup / teardown
- setUpModule / tearDownModule
- setup_module / teardown_module
第一种是测试框架 nose 的写法,pytest 从 7.2.0 开始不再兼容 nose 框架,这种写法无了
第二种是测试框架 unittest 的写法,这是 python 的标准库,应该会一直兼容下去
第三种是测试框架 pytest 的写法,是仿 xunit 风格,使用非面向对象的方式来创建夹具在实际的运行过程中,所有的写法都会统一处理成 fixture,建议一步到位直接写 fixture
2. pytest常用插件
1. pytest-html
用途:生成HTML测试报告
文档:https://pytest-html.readthedocs.io/en/latest/installing.html
安装:
1 | pip install pytest-html |
配置:命令行参数
1 | --html=report.html --self-contained-html |
2. pytest-xdist
用途:并发执行用例
文档:https://pytest-xdist.readthedocs.io/en/stable/
安装:
1 | pip install pytest-xdist |
配置:命令行参数
1 | -n {0,1,2,3,...,n, auto} |
注意:
- 多进程额外增加资源
- 多进程乱序
- 多进程竞争资源(-s失效)
- auto 自动判断进程数(CPU内核数)
3. pytest-order
用途:定义用例的执行顺序
文档:https://pytest-order.readthedocs.io/en/latest/
安装:
1 | pip install pytest-order |
配置:标记
1 | # 后执行 |
顺序规则:
● 先执行有order的用例,再执行没有order的用例
● 先执行order较小的用例,再执行order较大的用例
- order全局生效,可以跨文件、跨目录
4. pytest-rerunfailures
用途:用例失败时自动重试
文档:https://github.com/pytest-dev/pytest-rerunfailures
安装:
1 | pip install pytest-rerunfailures |
配置:命令行参数
1 | --reruns 5 --reruns-delay 1 |
5. pytest-result-log
用途:把用例的执行结果保存到日志文件
文档:https://mp.weixin.qq.com/s/f90fcj54pKvebnBahlllog
安装:
1 | pip install pytest-result-log |
配置:pytest.ini
1 | log_file = ./pytest.log |
pycharm插件:Ideolog(日志颜色)
6. allure-pytest
用途:生成allure数据文件
文档:https://docs.gameta.io/allure-report/# pytest
安装:
1 | pip install allure-pytest |
配置:命令行参数
1 | --alluredir=temps --clean-alluredir |
本插件只生成数据,不生成报告:
- 创建目录 temps
- 清空目录内容
- 在目录中创建数据文件
3. 定制企业级的测试报告
allure 是一个专业测试报告框架,是一个Java程序
allure-pytest 是一个pytest插件,是一个python程序
allure-pytest > 数据文件 > allure > 测试报告
1. 搭建allure环境
- JDK
下载地址:https://www.oracle.com/java/technologies/downloads/#jdk17-windows
安装:双击运行、安装、重启
版本:建议 JDK 17+
验证:
1 | java --version |
- allure源程序
下载地址:https://github.com/allure-framework/allure2/releases
解压:E:\abc\allure-2.24.1\allure-2.24.1\bin
修改环境变量:PATH
验证:allure
E:\abc\allure-2.24.1\allure-2.24.1\bin\allure
2. 生成企业级测试报告
generate 根据数据生成HTML报告
open 打开生成的HTML报告
serve 生成并打开HTML报告
serve = generate + open
1 | E:\abc\allure-2.24.1\allure-2.24.1\bin\allure generate -o report temps # 根据数据生成HTML报告 |
1 | allure generate -o report temps # 根据数据生成HTML报告 |
3. 定制报告内容
1. 功能分组
通过装饰器,对用例进行分组
1 |
敏捷开发的水语:
- epic 史诗 产品大方向
- feature 主题 功能模块
- story 故事 用户场景
- title 标题 具体测试点
allure仅建立行为层次结构(另一种是基于套件)
1 |
|
2. 自定义logo
确定插件的名称
custom-logo-plugin修改配置文件: “E:\abc\allure-2.24.l\allure-2.24.l\config\allure.yml”
加入新的插件名称,启用插件
在插件中修改logo:
“E:\abc\allure-2.24.l\allure-2.24.l\plugins\custom-logo-plugin\static\styles.css”
1 | .side-nav__brand{ |
三、接口自动化基础之Pytest框架之YAML详解以及Parametrize数据驱动(day15)
1. YAML语法详解
YAML是一个完全兼容JSON的数据格式。
重点:
- YAML完全兼容JSON
- YAML和JSON一样,是数据,不是语句
- 序列化:将编程语言中的数据转为文件
- 反序列化:将文件中的内容转为编程语言中的数据
- 文本文件: 可以使用记事本之类的工具进行创建、编辑
YAML优点:
- 结构更加清晰
- 语法更加简洁,支持注释
- 和Python风格相似
1. 序列化:Python转YAML
将Python数据转为JSON文件:
https://tw.unicodery.com/5b57.html
1 | data = { |
将Python数据转为YAML文件:
1 | pip install pyyaml |
1 | data = { |
2. 反序列化:YAML转Python
将JSON转为Python:
1 | import json |
将YAML转为Python:
1 | import yaml |
3. YAML特色
- 完全兼容JSON
- 支持注释(使用
#) - 成员通过符号表示:
-:表示列表(数组)成员::表示字典(对象)成员
- 通过缩进(2个空格)表示层级(Python使用4个空格)
- 自动处理类型
- 支持强制指定类型
2. pytest + YAML实现数据驱动测试
数据驱动测试(Data Driver Test)= 参数化测试(pytest内置标记)+ 数据文件(YAML、JSON)
1. 参数化测试用例
1 | import pytest |
2. 数据内容委托到独立文件
1 | import pytest |
YAML文件内容(ddt_data.yaml):
1 | - [1, 1, 2] |
3. 自动化测试框架结构
pytest是通用的测试框架,适用于:
- 白盒测试
- 单元测试
- 集成测试
- 黑盒测试(API、Web、App)
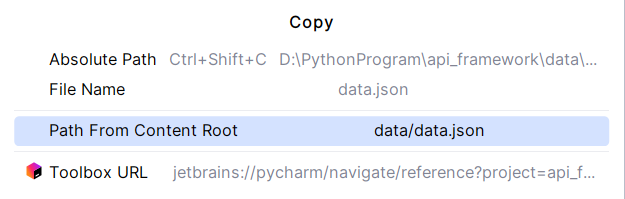
文件路径获取:

通用的黑盒测试框架:
1 | commons/ # 常用代码目录 |
相关配置文件
run.py
1 | import pytest |
pytest.ini
1 | [pytest] |
1.安装依赖
1 | pip install -r req.txt |
req.txt
1 | webdriver-helper==1.* |
将常用包打包成 requirements.txt
如果你希望保持每个项目独立,但又不想手动一个个安装依赖,可以:
在原项目中导出依赖:
1 | pip freeze > requirements.txt |
新建项目后,在终端运行:
1 | pip install -r requirements.txt |
这样就能快速恢复所有依赖。
2.启动框架
执行run.py文件或使用pytest